Maintenance
February, 2008
The time arrived when I should replace the Subaru Timing Belt. As near as I could figure I had 109,000 miles on the current timing belt. Being an old guy I was no longer looking forward to doing this job. Laying under a Volkswagen in my younger years was fun but now it has become hard plus, trying to remember what I took apart, and how!!
But enough whining and sniveling .
Fortunately I have a garage now and could work on it in a dry and warm place.
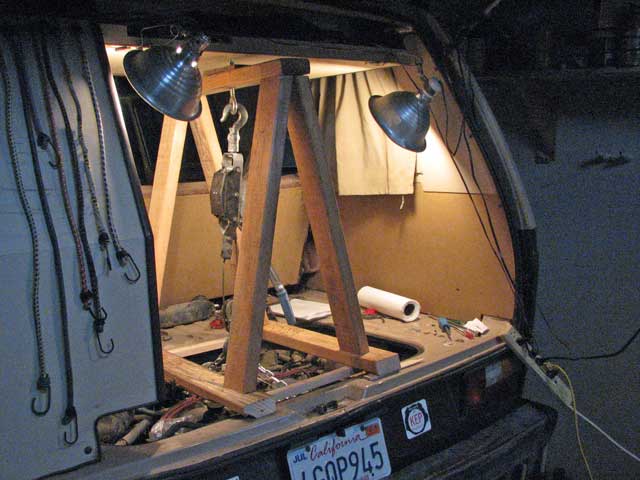
I built a tripod out of 2X4s to which I hung a come-a-long for use in lowering the engine/transmission once I had everything disconnected.
Googling around on the web I discovered it is a good idea to also replace the water-pump, crank and cam seals while replacing the timing belt. Also check to make the screws are tight on the back of the oil pump and reseal the pump to the block on re-assembly.
Since I have had oil leaks the past several years I also replaced the valve cover gaskets, the oil pan gasket, the 0-rings on the dip stick and since I was in a gasket mood I also replace the intake, exhaust and water crossover pipe gaskets.
I replaced the various small water and vacuum hoses running about the intake area of the engine.

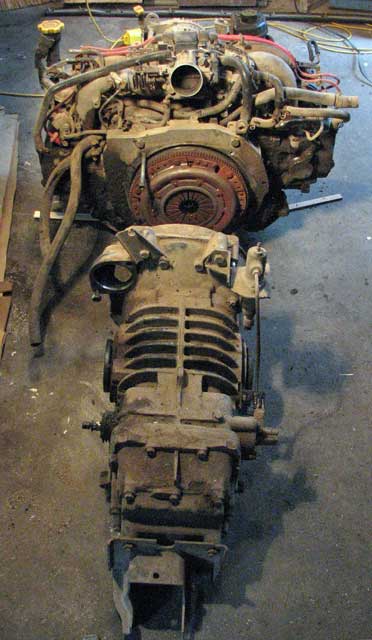
Here is the engine flopped over onto its back. The Kennedy shortened oil pan in the foreground.
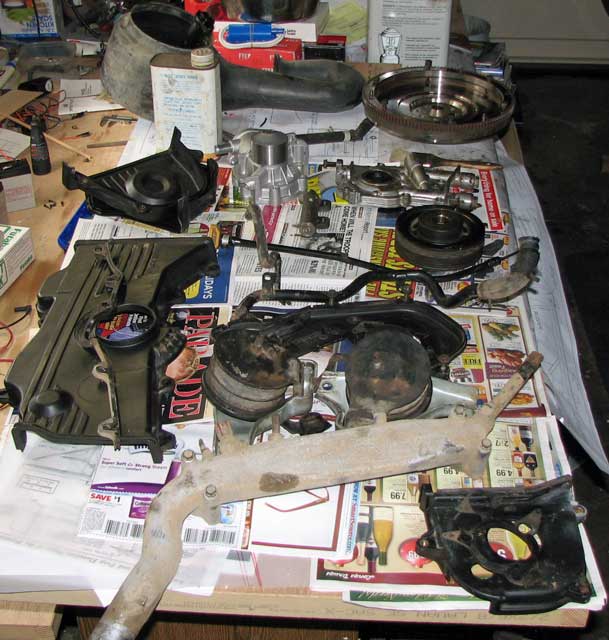
Bits and pieces piled up on a work bench. Getting damn scary!
Addressing the transmission I discovered the throw-out bearing was very worn and the fingers on the pressure plate also worn down to almost knife thin! The spline "receiver" in the center of the clutch plate was also loose!! There was a lot of metallic dust in the bell housing! I ordered and then installed a new pressure plate, clutch, throw-out bearing and pilot shaft needle bearings and had the flywheel resurfaced. I discovered one of the 17mm bolts holding the adapter plate to the engine was stripped! This may have allowed the transmission to engine mounting to flex, hence the strange wear on the throw-out bearing / pressure plate. I bought a helicoil kit and inserted new threads. Much better!
While dealing with the transmission I also installed a new clutch slave cylinder.
During this process I cleaned all the accumulated dirt, grease and mouse droppings! off the engine and transmission!
I discovered the mice had chewed on the plastic bag I had the engine computer wrapped in so I shopped around and found a baking pan approximately the right size and made a Plexiglas lid. I cut out one side of the baking pan large enough to allow the wiring harness access and protected the edges with a foam grommet. I put the computer back in the right side plenum where it was originally mounted.
I, of course, drained the coolant, cleaned out the burp tank and the overflow tank. (I wish I had flushed the coolant system before I started this project.) I discovered there were wear spots on the "return" hydraulic hose, from the power steering pump and also some wear spots on the heater hoses in various places. Putting everything back together I made sure to add protection and nylon zip-ties to the various hoses so they can no longer rub against each other or the body of the Vanagon.
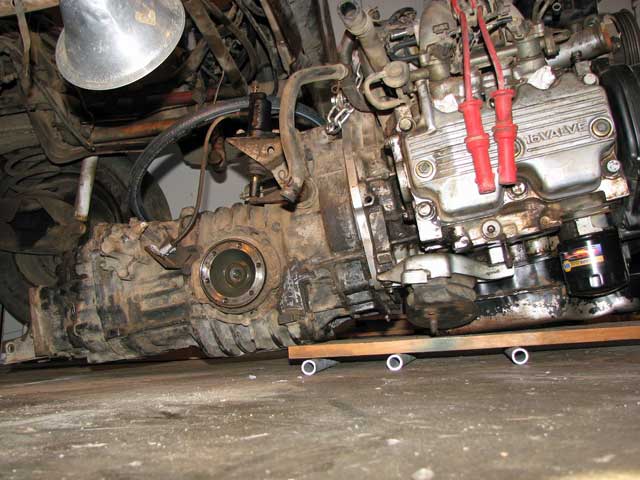
Here is the "low boy" rolling platform I made to set the engine on so I could roll it back under the Vanagon; three pieces of water pipe under a board!
Nothing left to do but use the come-a-long to lift the assembled engine and transmission back up into the Vanagon engine compartment. It was a bit tricker than that because I had to raise the transmission nose as I raised the engine so I could finally get the transmission mounting bolt installed then raise the engine on up into the engine compartment, constantly checking that nothing was pinched or in the way.
Of course I had done something during this rebuild process that caused me worry and sleepless nights. I had rotated the camshafts several times while trying to get the new timing belt installed correctly. After doing that I read on a website to be sure and not rotate the camshafts because that will pump the oil out of the hydraulic lifters!! Oh boy!
I buttoned everything up, added four quarts of 10-40 Castrol, a gallon of antifreeze plus water. (note: I have since been told I should have used distilled water.) I had also drained and refilled the transmission with a gallon of GL-4. I bled the transmission slave cylinder, topped off the power steering pump and arrived at that point in time when I will find out if I got it all back together correctly. The moment of truth!
But first, those damn hydraulic lifters! I decided to leave the spark plugs out, disconnect the coil pack and turn the engine over long enough to get the oil pressure light to go out. That should pump the hydraulic lifters back up. I cranked and cranked and cranked and finally the oil pressure light went out. Perfect!
I scooted around to the engine compartment and installed the spark plugs and connected the coil pack. Back to the drivers seat. I turned the ignition key and was almost blown out of my seat! A huge explosion! Well, it seemed huge in the confines of my garage!! I scurried around back to see if I had blown my muffler apart or maybe blew out a spark plug. All was okay! It was just that gas from the injectors was being, er, injected while I was cranking the engine waiting for oil pressure! I returned to the drivers seat and tentatively turned the ignition key again. This time it started right up! The lifters were quite noisy so I only ran it for a minute or so and then let it cool down. And, let my nerves settle.
The next day I started it again and this time the lifters were a lot quieter. It was time to burp the coolant and drive around a bit to let the bubbles gathered in the radiator and burp tank for final release. After about ten miles of driving the temperature gauge on the dash settled down to its usual location, just a touch above half way. Perfect!
Oh yeah, while removing and reinstalling the geared starter I discovered the lower bolt was a tad loose. When I put it back on the bell housing I made sure both bolts were tight. The starter starts much better now. It was a bit lazy before.
Maintenance. What a concept!! I had been enjoying trouble free motoring for seven years!!
I am quite surprised at how peppy the engine is. It is back to the varoom it had in its youth!! I think timing belts must stretch over time and allow the timing to drift a bit. The engine sounds a whole lot tighter and it has more pep!
The check engine light went out after about thirty miles of driving. Had me worried for a while. "Out is normal mode from past experience. It always comes on after cutting the power to the computer when replacing the car battery or other maintenance whre the power is off to the computer for a while. Drive it for a while and it will finally go out. And it did!!
We are planning our 19th or is it our 20th annual Spring Break this coming April, 2008. This upcoming trip was my main incentive for finally addressing the timing belt and the rest of this major repair. I am very glad I did it and was able to do it and that it ended up successful. Being I am coming up on 67 years of age hopefully this will be the last time I have to crawl under my Vanagon! But then again, it is a Volkswagen!